Replacing the rear brakes on your F250 or F350 is not a very difficult job but is more complicated than working on a semi-float axle (the kind you find in most cars and half ton trucks) and will require a little more care and a lot more Brake parts Cleaner!
You are going to need the following tools, supplies, and parts for the job.
TOOLS
13/16″ 1/2″ drive deep socket
5/8″ shallow socket
7/16″ shallow socket
1/2″ shallow socket
An assortment of socket extensions for convenience
Large 1/2″ drive breaker bar
3/8″ ratchet
Torque wrench capable of 50 – 135 ft-lbs.
Slotted screwdriver
Vice grips
6″ C-Clamp
Hammer
3/8″ Flare wrench
Speciality tools are listed below
2 9/16″ rounded hex socket for axle lock nuts, NAPA Part KDS2436
Brake Spoon and spring tools, can be found in Harbor Freight 7 Piece Brake Tool Set, P/N: 188-8VGA
Ford Factory Shop Manual Set, the most important tool you can have!
SUPPLIES
Wheel bearing grease, I use multi-purpose
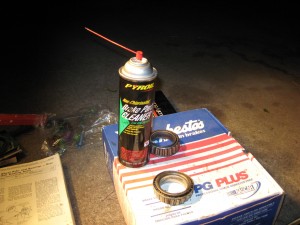
Brake parts cleaner, up to six cans
Many clean-up rags
PARTS
Brake shoes (My F250CS with 12″ x 12.5″ shoes is Rabestos 316PG)
Wheel Cylinders (Again, F250CS is WC370192 & WC370193)
Lock rings for hubs, NAPA Part 635-1100
Seals for hubs, NAPA Part 24917
Drum brake hardware kit
Okay, time to begin the fun!
Now, I’m going to start this article with a warning. This is a very messy job and you really should take some precautions. To start with make sure and wear clothing that can get messy, I recommend wearing disposable gloves so that you can snap a layer of grease off and put a clean one on. I also suggest picking up an oil drip pan to set underneath your work area saving your driveway. Also, keep in mind that it is very possible that the old brakes have asbestos liners, make sure not to breath any of the brake dust and under no circumstances should you use pressurized air to clean the drums.
All of the procedures in this article can be found in the factory manual under sections titled Brake Drums – Single Cylinder, Dual Piston, and Wheel Bearings and Hubs – Rear (Full Floating Axle).
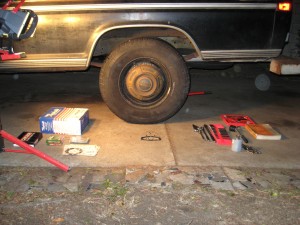
Start by cleaning your work area and setting out all the items you’re going to need. It would also help to have a truck handy, or at the very least an axle.
Click on any of the photographs to see a larger view.
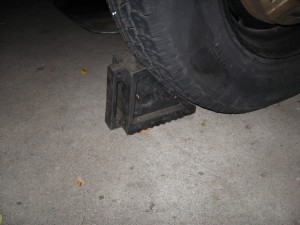
Put on your safety glasses and wear them for the duration of the project. Chock the truck’s front wheels, set your jack in place, and have your jack stands ready.
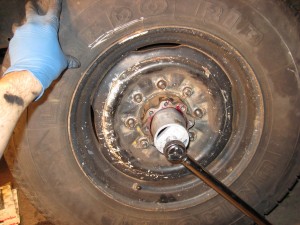
Remove your hub cap and break the eight lug nuts loose with the 13/16″ deep well socket and breaker bar.
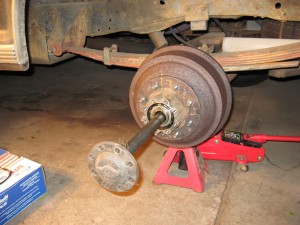
Jack up the side of the axle you are working on and secure it with a jack stand, remove wheel. In order to minimize the amount of gear oil running down the axle tube and onto your work area raise the side you are working on about three inches higher than the other side.
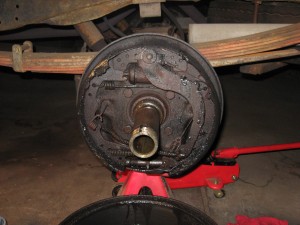
Remove the eight axle shaft bolts with the 5/8″ socket and a ratchet, then slide the axle shaft out and set it in a place where it will not get overly dirty.
Using slotted screwdriver and hammer straighten tabs on lock washer that are bent over the flats of the outer lock nut.
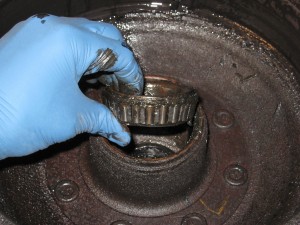
Remove outer lock nut with the 2 9/16″ socket and breaker bar, then remove the lock washer and inner lock nut. Pull entire brake drum/hub unit out toward you approximately two inches and set back in place then remove the outer bearing. If you have trouble moving the drum you may have to loosen the brake adjusting screw (see below, near the end of the article) if the shoes are holding the brake drum on (when a drum wears down it develops a lip on the outside, sometimes the shoes will catch this lip).
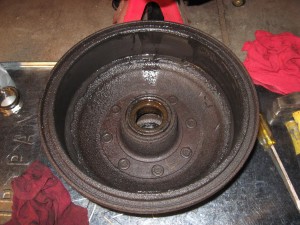
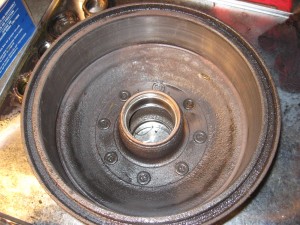
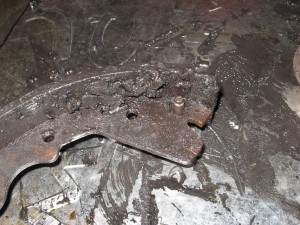
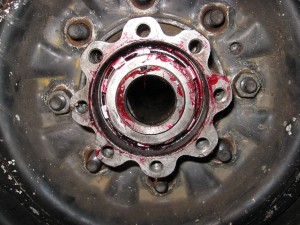
Now pull the brake drum towards you off and set it down down on your drip pan outside down. As you can see here my brake shoes actually had a lot of liner left on them but were completely slathered in wheel bearing grease and brake fluid due to a bad wheel cylinder and hub seal.
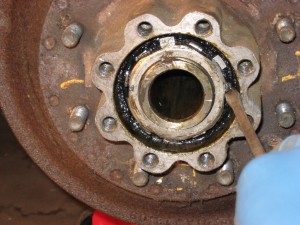
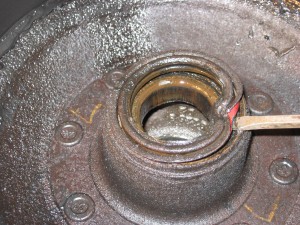
Remove the wheel bearing seal and discard. I find it easiest to take a hammer and screwdriver and collapse one part of the seal then pry the rest out. Take care not to damage the hub surface.
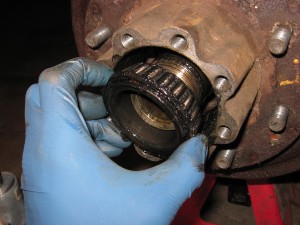
Then remove the inner bearing and let it soak in a solvent. While gasoline works you’re not supposed to recommend using that as a solvent anymore so I’d never suggest getting a metal bucket, filling it with about 2″ of gasoline, and tossing your bearings, hub nuts, and any overly greasy parts in. No, never.
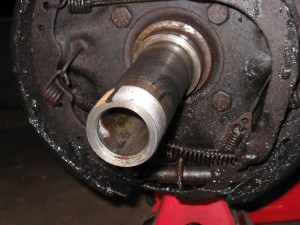
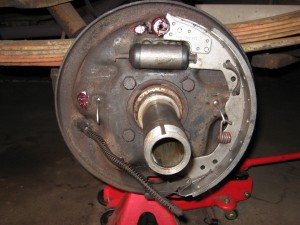
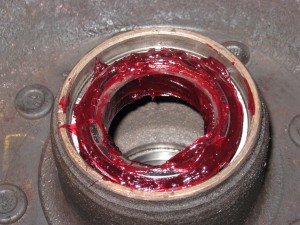
Now it’s time to use some brake parts cleaner, and a lot of it if you’ve got the mess I did! You want to clean the inside of the hub getting all the old grease out, clean out the inside of the drum, taking care to eradicate any and all grease, and clean the old grease off the spindle, taking care to clean the threads on the end. Then thoroughly clean the bearings themselves to get all of the old grease out then set them aside in a clean area. After you have cleaned everything out make sure the bearing races are smooth and not worn and the bearing needles are also not worn.
Now it’s time to start doing brakes!
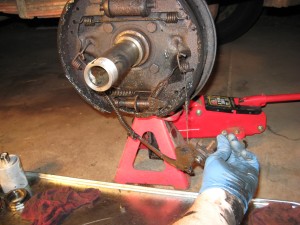
First remove the parking brake lever by removing the 7/16″ nut from behind the brake backing plate, hold the bolt in place with your vice grips.
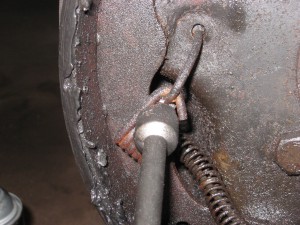
After loosening the slack on the adjusting cable and pull the over travel spring free from the adjusting lever. After that remove the parking brake cable and set these parts aside.
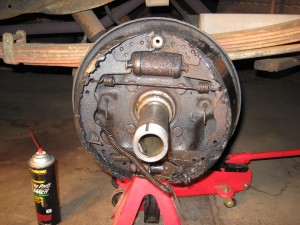
Using the large end of the silver spring tool remove the brake shoe retaining springs from both shoes. Set them aside. Then pull the brake shoes free and set them aside.
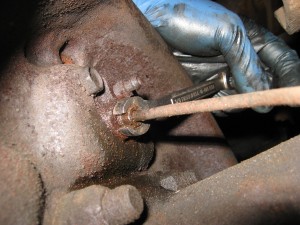
I recommend replacing the wheel cylinder while doing a brake job, they are cheap to buy and it’s not like you replace rear breaks very often. To do this start by removing the brake line with the 3/8″ flare wrench, then remove the wheel cylinder by removing the two 1/2″ bolts from the backing plate. After you’ve done this remove the two piston extensions, clean them up, and transfer them to the new wheel cylinder.
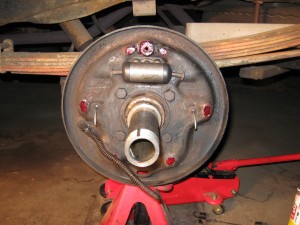
Now that you have everything off of the backing plate take a little time to clean it up. Using liberal amounts of Brake Parts Cleaner get all the old grease and brake dust off, again be careful not to breath this stuff. After you have done this take a moment to clean off your drain pan so that once again you have a clean work area.
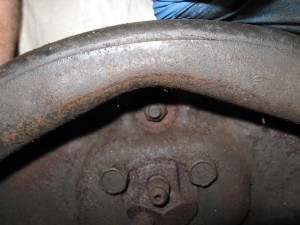
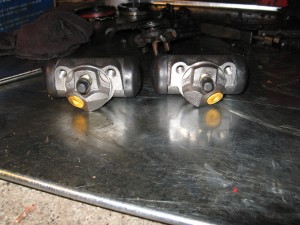
One thing to notice is that the wheel cylinders differ from the left brake to the right. The difference is minor, the brake line comes in the opposite side. See it illustrated below:
Install the new wheel cylinder taking care not to over-tighten the brake line, you don’t need gorilla strength here, then using your multi-purpose grease spread a little bit on the shoe contact points.
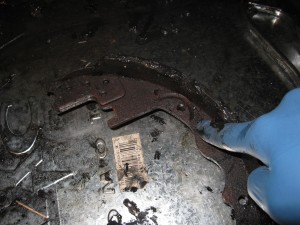
Now take the old rear shoe and remove the cable guide and drive the adjuster lever shaft out with your hammer and a socket extension, transfer these to the new rear brake shoe.
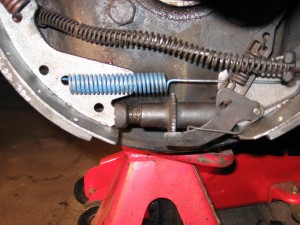
Attach the adjusting lever to the rear brake shoe and hold it in place with the adjusting lever spring. Using new hold down springs put one of the brake shoes in place, you should be able to get the spring on fairly easily by holding the shoe out of position, after you’ve hooked the spring put the shoe in it’s proper place making sure that it is properly engaged in the foot of the wheel cylinder piston extension.
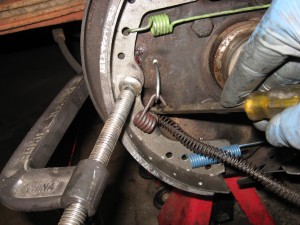
Now attach the retracting springs to their proper place on both brake shoes and put the other shoe in place. Because the retractor springs are in place you will not be able to move the shoe around, this makes attaching the hold down spring more difficult. To make this job easier I use a 6″ C-Clamp to hold the shoe in place freeing both my hands to attach the spring with a screwdriver.
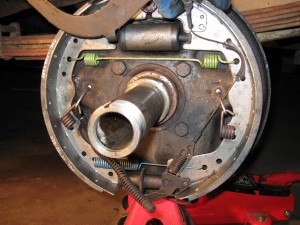
Now put the brake adjuster screw in place by spreading the brake shoes and slipping it in place, be careful not to knock the adjusting lever off in the process (don’t worry, you will). Now route the adjusting cable underneath the rear hold down spring hook and attach the over travel spring to the adjusting lever. Then route the cable around the cable guide and put the parking brake lever in place, tighten the nut behind the backing plate, then attach the parking brake cable to the lever.
Now do the preliminary brake adjustment by slipping the drum over the shoes, does it fit? If so turn the adjusting screw to expand the shoes and try again, do so until you can no longer get the drum on and then back it off just enough to install it. Set the drum aside for now.
Congratulations, you’ve just replaced your brake drums. See, it’s not as hard as people say, just a little irritating. Now it’s time to get dirty again!
If you need to replace the bearings and / or races do so now. To replace the races use a brass drift to carefully drive the races out of the hub in the same direction you remove the bearings. After that carefully drive the new races into place making sure to keep them straight and true.
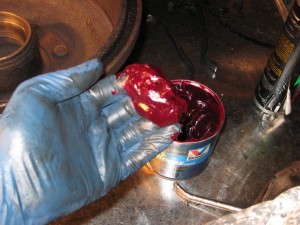
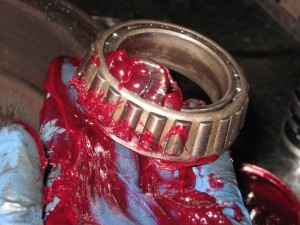
Using your grease take a nice big glob of it in your non-dominate hand (left for me) on your finger tips. Now with your dominate hand push the bearings from the wide end (where the largest gap is) and shove it towards the heel of your hand pushing the grease into the bearing. When you’ve got the hang of then and do it correctly you’ll see that it packs the bearings full of grease fast, who needs stinkin’ bearing packers?
Note the way the grease is coming out of the opposite side of the bearing (and pushing some old grease with it), this is what you want to see, nice legs. Now set that bearing in a clean area and pack the other bearing, isn’t this fun! Wipe some of the excess grease from your gloves on the spindle giving it a thin, even coating.
Set the inner bearing in place on it’s race. Now take the new seal and carefully drive it into place. You could use a seal installer, a large socket or piece of pipe, or just hammer it in. Because I was too lazy to go find a makeshift tool I just hammered the seal into place, do so by carefully tapping the seal into place working your way around the seal, you only move it in small amounts at a time (to keep it from getting crooked). When it’s in place you’ll notice the tone of the taps change to a more bell like sound.
Now carefully set the drum in place on the spindle (remember that you’ve got a brand new seal you don’t want to ruin), put the outer bearing in place, and make sure it turns freely. Run the inner nut in until it contacts the outer bearing then put the wheel on the hub/drum and run a couple lug nuts down to keep it in place. While turning the wheel tighten the inner nut to 50 – 80 ft lbs then back it off by 3/8 of a turn.
Now set the new lock washer in place over the inner nut and run the outer locknut down until it contacts the washer, now tighten it to 90 – 110 ft lbs. Check to make sure the wheel turns freely and the bearings are nice and tight (grasp the wheel and try to shake it). If everything looks good bend two of the lock washer’s tabs inward fully covering flats of the inner nut and two outward covering flats of the outer locknut.
Now get up off the ground, jump in the truck, and hit the parking brake and release it, I do this twice (this makes sure the drums are centered on the backing plates, not as much of an issue with these drums as with other styles as these tend to self center very well). Then go spin the wheels making sure they still turn freely. Now it’s time to manually adjust the brakes, everybody’s favorite part! To do so follow these instructions. After that adjust the parking brake like this.
After you are done adjusting and bleeding the brakes remove the fill plug from the differential and top off the gear oil (fill it until it starts to weep out of the fill plug). This would also be a good time to remove the vent hose (on the drivers side of the axle) and make sure it is obstruction free, if your vent hose is clogged the axle will pump oil out of one of your axle seals into your brake drum.
Once you’re done with your brake and hub service you will need to bleed the brakes starting from the furthest wheel from the master cylinder (Right rear first, then left rear, then right front, then left front). Keep in mind that your truck may have special procedures for brake bleeding such as centering a pressure differential valve or triggering a metering valve. Check your service manual to make sure of these before proceeding.
That’s it, now go out and enjoy what will probably be much better braking (as the drums were probably so out of adjustment they weren’t doing much anything).


bill
February 15, 2009 at 7:05 pm
WOW!!! As I am preparing to rebuild my brakes (first time for a dana 60), this has eliminated all the questions that I had and has given me an idea of what to expect when I pull it apart. Very good article and thanks a million.
HOOT
August 8, 2009 at 6:50 pm
Great write up. Been searching for soemthing like this to rebuild my F-350 rear brakes. Going to use your info here and adopt it to what I need to do my 1995 dually brake job. This will come in real handy for my Dana 70 install in my Jeep J20 this fall as well.
Thanks for the write up.
HOOT aka Tom Gibson
coleQ
October 29, 2009 at 3:40 am
Nice job on this how-to. Good info and great detailing in the steps.
-Cole
Follow me at http://twitter.com/ColeQ
steven
February 1, 2010 at 12:23 am
Just finished doing the job. Thanks for the great article and pictures.
My drums were full of gear oil when I pulled them off. I did find that my vent tube was clogged and gear oil was all in the drums. I spoke to the napa guys and they said that the inner seal may need to be replaced. How do you know? And how is this done?
Thanks for your help.
Steven
GSequoia
February 1, 2010 at 12:30 am
The only seal you have to worry about on a rear axle is the one that I showed being removed and reinstalled here, it is normal for gear oil to be in the tubes on a rear axle. If your vent is blocked it may pump it into the brakes but your seal is probably blown as well.
Some front axles, such as the Dana 30 used in Jeeps have seals on either side of the differential that keeps the oil out of the tubes.
Bll
February 19, 2010 at 3:57 pm
Hey,
Great write- up but I need to know how to remove the old worn out drum from the hub on my Dana 60. Your article does not describe this… I have new drums, but how do I swap them?
Thanks,
-Bill
Ega
September 2, 2020 at 10:44 pm
Hey Bill, how did you figure out How to re-use the hub with the new drum? I’m running into the same issue.
GSequoia
February 19, 2010 at 4:15 pm
I don’t have the truck in front of me but by looking back at these photos I’m quite sure that you just need to press all the wheel studs out then separate the two. Because the hub has been in the drum for so long you may find that you have to press the hub out (pressing from the outside in). Once you have the hub out of the old drum transfer it to the new one and press the studs back in (or replace them).
If you don’t have access to a press I would recommend hitting up a NAPA Auto Parts or another small type parts store that has a machine shop, they will usually do the press-work for a very good price.
Dan
June 12, 2021 at 10:12 am
Awesome article. I need to get my hubs pressed off. I made a trailer axel 25 years ago, had these hubs and spindles on with no brakes. I’m rebuilding the wheel bearings and the trailer and decided to take the drums off because I’m not using the brakes. 3-4 days of soaking them in WD40, hammering on them (carefully)with no luck. Now I know they are pressed on. LOL Thanks for all of your shared info, greatly appreciated Sir !
Dan
Don
July 24, 2010 at 5:06 am
Thanks for the C-Clamp tip.
mike
August 3, 2010 at 10:26 am
when I did mine the other day, I took off the drum with the spindle still on the truck by beating the crap out of it with a rubber hammer, and after a while it broke loose.
Tonys Digi-sky Cam F350
September 15, 2010 at 2:22 pm
I have a 1991 F350 4×4 that is squeaking at speeds less than 25mph. It sounded just like a U joint, so I replaced all 3 in the drive shaft. Well to make the story short, it still squeaks. I have been reviewing your great article but I have a few concerns. I am told that the gear oil flows into the hub from the pumpkin but in your 3rd photo the axle looks dry and later your packing the bearing with grease . I know that some oil has leaked out of one of the hubs and down the tire while it was sitting in the Arizona sun. So if the oil slightly flows out of the rear diff into the bearings, doesn’t that wash out the grease? I guess Ill find out when I take it all apart..
Keith in NC
October 12, 2010 at 7:17 am
Gasoline as a solvent???? Shame on you!!!!
(It actually works really good but in a pinch, kerosene will do the trick
and it’s not quite as risky!!)
Jason
November 2, 2010 at 7:41 pm
Very good tutorial, I found it very simple to understand…had no problem.
encapejef
February 13, 2011 at 7:05 pm
Бесплатная RPG онлайн игра Техномагия завоевала интерес тысяч пользователей различной возрастной категории оригинальным интерфейсом, геймплеем, игровым движком. Игра в стиле фэнтези совместила в себе элементы стратегии, тактики и логики. Мир Техномагии красочен и ярок, графика основана на флеш-анимации, при этом ее системные требования минимальны.
pat Yak
May 14, 2011 at 9:44 pm
Thanks a lot for posting this. Different mechanics acted like only they and God could undertake the Ford F250/350 rear brake project but it turns out it is no more difficult than the fronts.
Thank you again for clear instructions and large blow-up photos. Other than the grease it was fairly easy.
I replaced the wheel cylinders along with drums, springs and shoes.
It all started out when I bought this truck not running. When I got it working I drove it and the brakes would lock up. After several lockups the brakes were cooked. I found out that the vacuum booster can stick in the boosted position and not let brakes relax so I was driving with the brakes on.
All is well now!
While at it I decided to fix an exhaust manifold downpipe stud that was too short to put one of the two nuts on. After using expensive rusted breakfree, a hammer, maap gas torch and wax, and a very good stud removal tool by Titan for about $19 at Summit racing, I decided to drill a small 3/16′ hole through the outside of exhaust manifold exit 1/2 in from end directly into the frozen stud. I then squirted the rust break free into hole and then removed it with the Titan stud removal tool and a 3/8′ flex ratchet. If anyone tries this, be sure to drill within half an inch from end as you don’t want to drill into manifold . I had enough grip with the stud removal tool but if I had given any more pressure I would have broken off the stud and then –well I don’t want to think about removing the intake manifold, distributer and head to get at the broken studs in someone’s driveway
Anonymous
September 7, 2011 at 10:16 pm
why did you pack the barings dont thay get lubed by the gear lub
mark moore
September 25, 2011 at 5:41 pm
Man thanks so much for info .I just completed my 78 f250 dana 60 . Thanks to this site I had all the parts I needed and all the info to make it and easy job.$485 is what the shop wanted to this . Saved me alot of money .Thanks Mark
BILLY
October 22, 2011 at 5:13 pm
Very good,just what I was looking for,Thanks
Mark
February 20, 2012 at 4:41 pm
The full floater dana 60 is lubed from the gear oil, not packed with grease.
GSequoia
February 26, 2012 at 1:28 pm
While it’s true that the bearings get gear oil you need to supply initial lubrication through packing, look in any factory manual and you will see. The gear oil will eventually replace the grease; fail do to this and will prematurely wear the bearings.
mark goodenough
May 1, 2013 at 5:28 am
thank you for doing this. i have a 1977 ford f-250 4×4 that i need to do the rear brakes on and this is what i needed to find. well im doing a restoration on it also but you are the only one to put this out there for dumb people like me to follow. again thanks.
Eric
October 19, 2013 at 10:27 am
Thanks a lot for this write-up. One issue for me was that the 24917 seals were way too small. The proper seal for mine is NAPA #28720.
Chriso
April 21, 2014 at 8:09 pm
Very grateful that you and others have posted info on the net.i had a lot of trouble just trying to order parts for a 90 model f250,seems a real mystery to most suppliers . Additional info proved even more of a challenge.A good place to start brake overhaul is to remove rear drum and determine width of shoe and if possible bore diameter of wheel cylinder as most suppliers will require this info. Also I would recommend replacing all springs and auto adjust cable and linkages as they often fail with age and will destroy all of the new bits you have replaced.good luck
Douglas
July 25, 2015 at 5:35 am
Thank you for taking the time to post this valuable information. I am in the process and this has answered all my questions. Thank very much!
Andy
February 13, 2021 at 9:04 am
Thank you for this tutorial! I have searched far and wide, and this is the best step-by-step out there. Great job! It’s 2021, and your post is still being used and is extremely helpful.